
The girls have been on at me to make a worm farm for a few weeks now. I told them when they'd collected everything they needed I'd help them make one. To be honest they didn't need much of my help!

If you want to make one yourself here's how to do it!
You will need
- A jar
- Some gravel
- Some sand
- Some soil
- Some leave and or grass cuttings
STEP ONE
Find yourself a clear jar with a plastic lid so you can pierce hole on so your worms will be able to breath and make the holes in the lid using a nail and hammer.


STEP TWO
The first layer to put in the jar is gravel so that there is plenty of drainage.
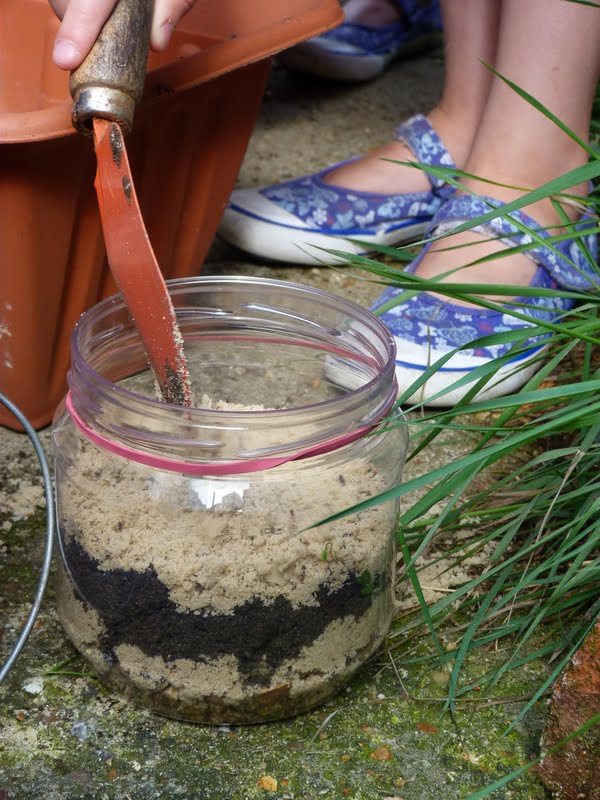
STEP THREE
Then add the first layer of sand only about 2cm deep per layer.
STEP FOUR
Then add a 2cm deep layer of soil.


STEP FIVE
Add another layer of sand followed by another layer of soil and then water a little. (NOT TOO MUCH WATER AS WORMS CAN DROWN)
STEP SIX
Put some worms in. At least 3 but preferably 5 or more.

STEP SEVEN
Gently put the leaves and grass on top.
WHAT TO LOOK FOR!
- The worms will burrow in the soil You should be able to see a trail as they travel from one soil to another and mix the soil together. This is what they do in the garden beneath our feet!
- The worms will pull down the leaves and grass clippings into the soil to feed.The worms help to carry away dead and decaying material into the soil, where tiny mirco-organisms help to break them down into humus-rich soil. The worms make the soil fertile so that the new plants can grown making it possible for the plant life cycle start all over again!
WORM ANATOMY
- You might also notice that one end of the worm looks sharper than the other. This sharper end is the head end of the worm.
- You may also notice a fat ring round the middle of the worm. This is called a saddle and is where the worm keeps all their eggs safe.
No comments:
Post a Comment